

Table of Contents
LED strip lights are thin, flexible, self-adhesive tapes carrying a row of small LEDs, usually powered at 12 V or 24 V through a separate driver. To choose the right one, check five things in this order: the voltage, the lumens per metre, the colour temperature, the IP rating and the wattage of the driver.
An LED strip draws a line of light where no ordinary fitting will go: under kitchen wall units, behind a headboard, along a ceiling cove or under the nosing of a stair. It comes on a reel, cuts to length and sticks in place in a few minutes. It is still a small electrical system, though, with its own rules: a driver sized correctly, a polarity to respect and a maximum run length you should not exceed. This guide sets out the figures that really matter, the ones spec sheets tend to jumble together, then the fitting method step by step, with the Irish rules on who may do which part of the job. And when a strip is not the right answer, we show you the alternative: our range of LED lights gives you the same line of light with nothing to assemble.
What are LED strip lights?
An LED strip, also sold as LED tape or a light strip, is a flexible printed circuit a few millimetres wide with LEDs soldered along it at regular intervals. A double-sided adhesive on the back lets you stick it to any clean surface. Two copper tracks run the full length of the tape and carry the current to every LED.
The tape is divided into identical segments. Each segment groups a few LEDs with the small components that limit their current, and each one works on its own. That is what makes the strip cuttable: between two segments, a line marked with a small scissors symbol and a pair of copper pads on each side shows exactly where to cut. Cut anywhere else and the damaged segment will not light again.
Most strips run on extra-low voltage direct current, 12 V or 24 V. They do not plug straight into a socket: they need a driver, also called an LED power supply or transformer, which converts the 230 V alternating current of an Irish home into low-voltage DC. At 12 V or 24 V the tape itself is far less dangerous to touch than anything running at mains voltage, which is why it is so popular for DIY projects. The driver, on the other hand, is a mains appliance, and it is treated as one.
LED strip lights have a few weak points, and it is better to know them before you buy. Cheap tapes often overstate their brightness and their colour quality. The adhesive gives up on a warm or greasy surface. Heat shortens the life of the LEDs if the tape is stuck to a surface that cannot carry it away. And a long run fed from one end will be visibly dimmer at the far end. Every one of these problems has a simple fix, and each is covered below.
Which type of LED strip should you choose?
Two families share the market, and the first choice is about the look you want.
SMD strips: a row of dots
An SMD strip carries surface-mounted LEDs spaced a few millimetres apart. Their four-digit code gives the size of the chip package in tenths of a millimetre: a 2835 LED measures 2.8 x 3.5 mm, a 5050 measures 5.0 x 5.0 mm. The more LEDs per metre, the more even the line looks. Fitted bare, an SMD strip shows a string of bright dots, especially when it reflects in a glossy worktop. An aluminium profile with an opal diffuser smooths that effect away.
COB strips: one continuous line
A COB strip, for chip on board, packs tiny chips so closely that a single layer of phosphor covers them as one band. The result is an unbroken line of light with no visible dots, even without a diffuser. It is the right choice for an alcove, a glass shelf or a mirror, anywhere the tape can be seen directly.
Fixed white, tunable white or colour
For the colour of the light itself, there are four versions. The table sums them up.
| Version | What it does | Controller | Best for |
|---|---|---|---|
| Single colour | One white: warm, neutral or cool | None, or a compatible dimmer | Kitchen, coving, wardrobe |
| CCT (tunable white) | White adjustable from warm to cool | Yes | Bedroom, living room, home office |
| RGB | Colours mixed from red, green and blue | Yes | Mood lighting, gaming, decoration |
| RGBW | Colours plus a true white LED | Yes | Colour in the evening, a clean white the rest of the time |
An RGB strip makes its white by lighting all three colours at once, and the result often looks bluish or pinkish. If you also want a pleasant white to light the room with, choose RGBW. CCT, RGB and RGBW strips all need a controller, operated by a remote, a wall button or a phone app, and many of them connect to the same smart home systems as a smart bulb.
12 V, 24 V or mains: which voltage for your LED strip lights?
Voltage decides how long a run you can light in one piece, and it is the most poorly explained figure on the packaging.
Why 24 V goes further than 12 V
Electrical power is voltage multiplied by current. For the same wattage, a 24 V strip therefore draws half the current of a 12 V strip. It is the current that heats the thin copper tracks and causes a voltage drop along them: less current, less loss. On a long 12 V run, the last LEDs receive less voltage and are visibly dimmer than the first, sometimes with a shift in colour. The same project at 24 V keeps a more even brightness from end to end. The effect is well documented: constant-voltage strips are sensitive to the voltage drop that builds up along a long length fed from a single point.
In practice, 12 V suits short lengths: a piece of furniture, a shelf, a strip behind the television. For a ceiling cove, a staircase or an L-shaped kitchen, go for 24 V. On a staircase, a strip is one layer among others, as our guide to staircase lighting shows. The manufacturer states on the spec sheet the maximum length that can be fed from one end: stick to it, because it depends on the wattage per metre of each model.
Mains-voltage strips are a different product
Some strips connect directly to the mains with no separate driver. They cover long distances, often outdoors, inside a sealed silicone sleeve. But their tracks carry 230 V: they can only be cut at the points the maker allows, every joint must be perfectly insulated, and they have no business within easy reach or near water. For use indoors at home, extra-low voltage remains the sensible choice.
Never connect a 12 V strip to a 24 V driver: the LEDs receive twice their rated voltage, overheat and fail very quickly. The driver’s output voltage must match the strip exactly. Only its wattage can be higher than you need.
Reading the spec sheet: lumens, watts, colour temperature and CRI
An LED strip data sheet lists a dozen figures. Four are enough to choose.
- Luminous flux in lumens per metre (lm/m). This is the amount of light the strip actually gives out. A mood strip hidden in a cove can stay discreet. A strip that lights a worktop must deliver a great deal more. Always compare lumens, never watts: two strips of the same wattage can give very different amounts of light.
- Power in watts per metre (W/m). It does not tell you how bright the strip is, but you need it to size the driver. Multiply it by the length you are fitting to get the total load.
- Colour temperature in kelvin (K). Around 2,700 K to 3,000 K the light is warm and suits living rooms and bedrooms. It also keeps a coloured wall true, as in a terracotta bedroom. Around 4,000 K, a neutral white helps you see true colours on a worktop. Above 5,000 K, cool light is mainly for a garage or a workshop.
- Colour rendering index (CRI). It measures, out of 100, how faithfully colours look under the light. The higher it is, the more food, timber and fabrics keep their real colour. For a kitchen or a display cabinet, it is a figure worth checking closely. It matters just as much for a painting or a framed print, as our guide to picture lights explains.
If you want to dim the strip, check two things: the strip must be sold as dimmable, and the dimmer must be designed for an LED driver. A standard dimmer switch fitted in front of a driver that does not support it will make the strip flicker or buzz. The driver’s data sheet lists the dimming methods it accepts, and the dimmer has to be one of them.
Which IP rating for which room?
The IP code, set out in the standard I.S. EN 60529, tells you how well a product’s enclosure keeps out solid objects (first digit) and water (second digit). For a strip, the second digit is the one that matters, and it comes from a silicone coating or sleeve over the tape.
- IP20: no protection against water. A bare strip for the living room, the bedroom, a wardrobe or a bookcase.
- IP44: protected against splashing water. For a kitchen away from the sink, or a porch that stays sheltered.
- IP65: dust-tight and protected against water jets. For the splashback above the sink, a bathroom outside the zones closest to the shower, a covered area outdoors.
- IP67 and IP68: protected against immersion, temporary for IP67 and prolonged for IP68. For a pond or a pool, and only with equipment made for that use.
Bathrooms have their own rules. In Ireland they are set by the National Rules for Electrical Installations, I.S. 10101:2020, which NSAI draws up from the international IEC and European CENELEC wiring standards with Irish content added. The rules treat the bathroom as a special location, covered in Part 7, and divide it into zones around the bath or shower: the closer to the water, the higher the IP rating required and the tighter the limits on voltage. The exact requirements for each zone are in the standard itself, and applying them is the electrician’s job, not a line on a packaging label. Just as important: under the Safe Electric scheme, electrical work in the special locations of Part 7 is Restricted Electrical Work in a home, which only a Registered Electrical Contractor may carry out and certify. So choose a strip and a driver rated for the room, and have the connection done by an REC. For light on a mirror or above a basin, a fitting from our range of bathroom wall lights is often the simpler answer.
LED strip lights in the kitchen: lighting the worktop
The kitchen is where an LED strip earns its keep. A ceiling light shines on the back of whoever is cooking, and their shadow falls right across the worktop. A strip fitted under the wall units, the presses above the counter, gets rid of that shadow.
Fit the strip towards the front of the wall unit, inside a profile: the light then falls on the worktop and not just on the splashback, and the tape stays out of sight from the rest of the room. For the colour, a crisp warm white or a neutral white, around 3,000 K to 4,000 K, with a high CRI, shows food in its true colours.
Near the sink and the hob, steam and splashes are part of daily life: choose a protected strip and a closed profile that wipes clean in one go. Think about the switching too, with its own switch, a motion sensor or a touch button on the profile. A worktop strip that can only be turned on from the living room remote does not get used for long.
A strip does not replace the main light. It adds to a ceiling light or to a kitchen pendant light above the table or the island. Over an island, a long fitting such as our LED kitchen island pendant light, available in 3,000 K or 4,000 K, lights the whole surface in one line, while the strip handles the counters along the wall.
How to install LED strip lights
Fitting the tape is well within the reach of a handy person as long as you stay on the extra-low-voltage side. The connection to the 230 V supply is another matter: in Ireland, the Commission for Regulation of Utilities, which oversees the Safe Electric scheme, tells homeowners to always use a Registered Electrical Contractor for electrical work in the home, and reminds them that it is the law. The simplest DIY route is a kit whose driver plugs into an existing socket with a standard three-pin plug.
- Measure the length to light, then round down to the nearest segment: the tape can only be cut between two segments.
- Work out the driver’s wattage. Multiply the watts per metre by the length to get the total load, then choose a driver rated comfortably above it, so that it never runs flat out: a driver working at its limit runs hot, and heat is what wears electronics. Example: 4 m of a 10 W/m strip draws 40 W, so a 60 W driver leaves sensible headroom. Check the driver’s data sheet all the same: it states the recommended load and the ambient temperature it is rated for, and some dimmable drivers have their own minimum load.
- Cut on the mark, through the middle of the copper pads, with sharp scissors.
- Connect with a clip-on connector made for the width of your tape, or by soldering if you know how. Respect the polarity: the + lead of the driver to the + pad, the – lead to the – pad. Getting it the wrong way round usually does no harm to a single-colour strip, but it will not light.
- Test before you stick: power up, check that every segment lights, then switch off.
- Stick to a clean, dry surface, degreased with isopropyl alcohol. On a rough or warm surface the adhesive lets go: fit the tape in an aluminium profile instead, which holds better and draws heat away from the LEDs.
- Put the driver somewhere ventilated and accessible, never buried in insulation or taped to the strip.

Long runs: feed from both ends
Beyond the maximum length stated by the manufacturer, do not join several reels end to end on a single feed: the far end would go dim and the first tracks would run hot. You have two options. Either run a second cable from the same driver to the other end of the strip, observing the polarity. Or split the run between several drivers, each feeding its own section. The cable from the driver must have a cross-section large enough for the current it carries: on that point, follow the driver’s instructions.
Do you need an electrician in Ireland?
It depends on where the 230 V side ends up. A plug-in kit that you stick up yourself is not electrical installation work. Hard-wiring a driver into the fixed wiring of the house is. Safe Electric lists what counts as Restricted Electrical Work in a home: a new fixed installation, a new circuit or protective device, any change to the distribution board, and work in the special locations of Part 7 of the National Rules, which include bathrooms. Only a Registered Electrical Contractor may carry out and certify that work, and they must give you a completion certificate. Minor works such as like-for-like replacements or moving a light fitting without affecting the circuit are excluded, but a new circuit for under-cabinet lighting is not a minor job. When in doubt, ask an REC: you can check a contractor’s registration on the Safe Electric website.
The most common faults
A segment that stays dark almost always comes from a cut made off the mark, or a connector not pushed fully onto the pads. A dimmer far end means the run is too long for the voltage chosen: feed it from both ends. Flickering points to a driver that is too small or a dimmer that is not compatible. And a strip that peels off was stuck to a greasy or warm surface: move it into a profile, which solves the problem for good.
LED strip lights or an integrated LED fitting?
A strip is unbeatable when it has to follow a unit or a cove to the centimetre. But it needs a driver to hide, connections to make and a profile to finish it off. When all you want is an elegant line of light above a table, along a wall or in a hallway, a light fitting with integrated LEDs gives the same effect with no assembly at all: the LEDs, their driver and their diffuser are already built in and matched.

Above a table or an island, a linear LED pendant light gives you the continuous line of a COB strip, with a proper diffuser. Our modern oak linear pendant light, 120 or 150 cm long, is exactly that idea in solid timber. On the wall, LED wall lights draw a stroke of light across the plaster and are wired like any other wall light. Overhead, an LED ceiling light replaces a pendant and its bulb in one fitting, and it can sit on the same circuit as an existing light.
The method comes down to three questions: how long, where, and what mood. The length sets the voltage, the location sets the IP rating, the mood sets the kelvins. The rest, wattage and driver, is simple arithmetic.
LED strip lights: frequently asked questions
Do I need an electrician to install LED strip lights?
Not for a plug-in kit: sticking up the tape and plugging its driver into an existing socket is not electrical installation work. Hard-wiring the driver into the fixed wiring is different. In Ireland, a new circuit, any change to the distribution board and new work in a bathroom are Restricted Electrical Works, which only a Registered Electrical Contractor may carry out and certify.
What do LED strip lights plug into?
Most LED strip lights run at 12 V or 24 V DC, so they plug into a driver, not straight into the mains. The driver converts the 230 V supply to the strip’s voltage. It either has a standard three-pin plug for an existing socket, or it is wired into the fixed installation by a Registered Electrical Contractor. Its output voltage must match the strip exactly.
Can I connect LED strip lights to mains?
Only mains-voltage strips connect directly to 230 V, and they are a separate product, mostly used outdoors in a sealed sleeve. A 12 V or 24 V strip always goes through a driver. Connecting a driver to the fixed wiring of a house is electrical work: in Ireland, use a Registered Electrical Contractor, who will give you a completion certificate.
How long will an LED strip last?
The rated life is given in hours on the spec sheet, often with the mention L70: the number of hours after which the strip gives out only 70% of its original light. In real use, heat is the main cause of wear. A strip fitted in an aluminium profile, with a driver that is not running at full load, lasts noticeably longer.
What are the disadvantages of LED light strips?
They need a driver to hide and connections to make, cheap tapes often overstate brightness and colour quality, the adhesive fails on warm or greasy surfaces, heat shortens their life, and long runs go dim at the far end. An aluminium profile, a driver rated comfortably above the load and 24 V for long runs deal with most of these problems.
Can you cut LED strip lights?
Yes, but only on the marked cutting lines, which sit between two pairs of copper pads every few centimetres. Each segment between two lines works on its own, so the rest of the strip keeps working. Cut anywhere else and the damaged segment will not light. Mains-voltage strips can only be cut at the points the manufacturer specifies.
Sources
- Safe Electric, Restricted and Controlled Electrical Works: definitions under S.I. No. 264 of 2013, including the special locations in Part 7 of the National Rules for Electrical Installations. safeelectric.ie
- NSAI, National Rules for Electrical Installations I.S. 10101:2020, frequently asked questions: how the wiring rules are drawn up from IEC and CENELEC standards. nsai.ie
- Commission for Regulation of Utilities (CRU), Electrical works in your home: use of Registered Electrical Contractors and completion certificates.
- Wikipedia, LED strip light: 12 V and 24 V drivers, SMD packages and voltage drop along long runs. wikipedia.org
- I.S. EN 60529, Degrees of protection provided by enclosures (IP code), published in Ireland by NSAI.
Related products
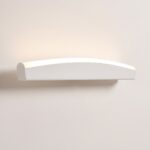
Horizontal wave LED aluminium wall light

Folded metal LED kitchen island pendant light
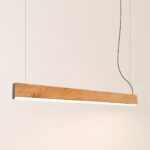
Modern linear oak LED pendant light
See also

Teal Bedroom Ideas: Colours, Gold Accents and the Right Light for a Dark Wall

Downstairs Toilet Lighting: The Right Light for a Small, Windowless WC or Cloakroom

Wabi-Sabi Interior Design: The Beauty of Imperfection, Right Down to the Light
